3.3.1.8. Import DC/IP data
DC and IP data can be imported in from three main file types: Use the main project menu: Import → Data → DC/IP
3.3.1.8.1. Import 2D DC/IP data
DC and IP data used by the DCIP2D inversion routine can be imported through six different file formats: Use the main project menu: Import → DC/IP → 2D
Note: Importation from a CSV/XYZ file is found under Import → DC/IP and is independent of dimension in the menu
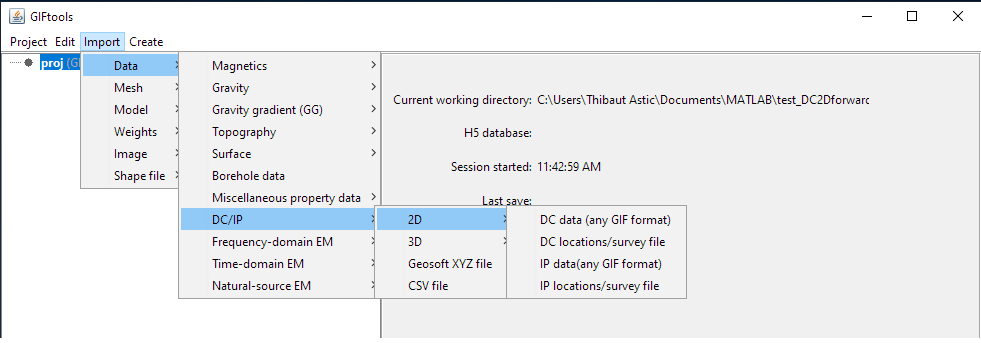
File formats:
3.3.1.8.2. Import 3D DC/IP data
DC and IP data used by the DCIP3D inversion routine can be imported using the main project menu: Import → DC/IP → 3D
Note: Importation from a CSV/XYZ file is found under Import → DC/IP and is independent of dimension in the menu
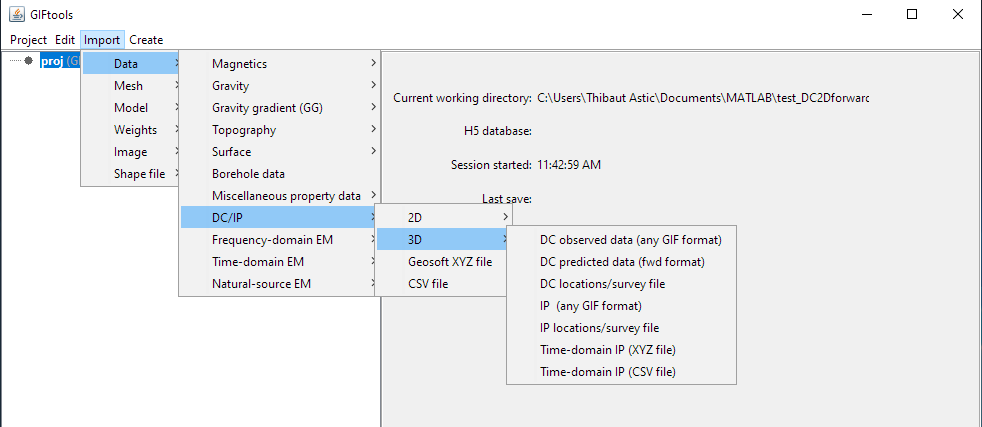
File formats:
3.3.1.8.3. import 3D TDIP data
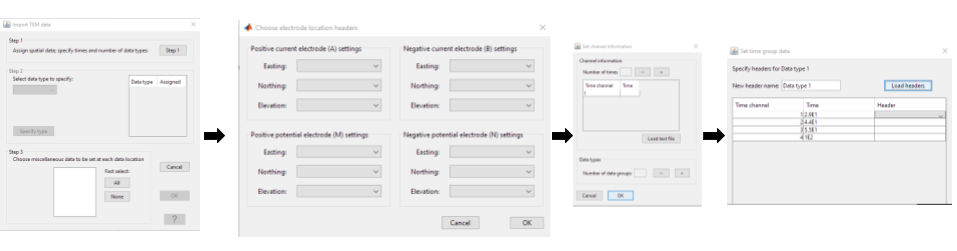
It is possible to import IP data with several times windows from a CSV or XYZ file (this is not supported by any DCIP GIF format).
Step 1: assign spatial data and time windows
Click this button to specify the Easting, Northing and Elevation columns.
In the window that pops up, set the time of each time windows (can also be loaded from a text file with one time per line)
step 2: select the data type and data columns
Add and select a data type. Clic on specify type and assign the header for each corresponding column (can also be loaded from a text file with one header per line)
Step 3: add miscellaneous data
This step is used to define any remaining data columns. This might include intensity of the sources etc.